Overview
You can make Azure Storage the foundation for building enterprise data lakes on Azure with the help of Azure Data Lake Storage Gen2. You can use SkyPoint AI’s built-in connector for importing data from Azure Data Lake Storage Gen2.This document will guide you through the process of connecting Azure Data Lake Storage Gen2 to Skypoint AI.Prerequisite
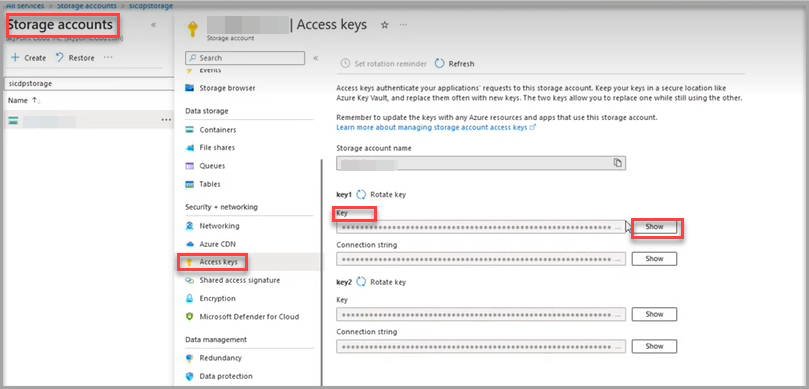
You will need the following details to configure and import data using Azure Data Lake Storage Gen2 connector:
- Storage account name
- Account key details
- Storage path.
Import data using Azure Data Lake Storage Gen2 connector
Follow the below steps to create a new dataflow for the Azure Data Lake Storage Gen2 import connector:
- Go to Dataflow > Imports.
- Click New dataflow.
The Set dataflow name page appears.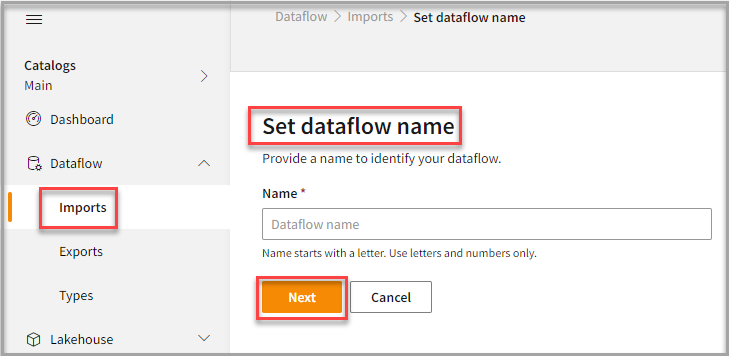
- In the Set dataflow name page, type Dataflow name in the Name text area.
- Click Next.
The Choose connector page appears.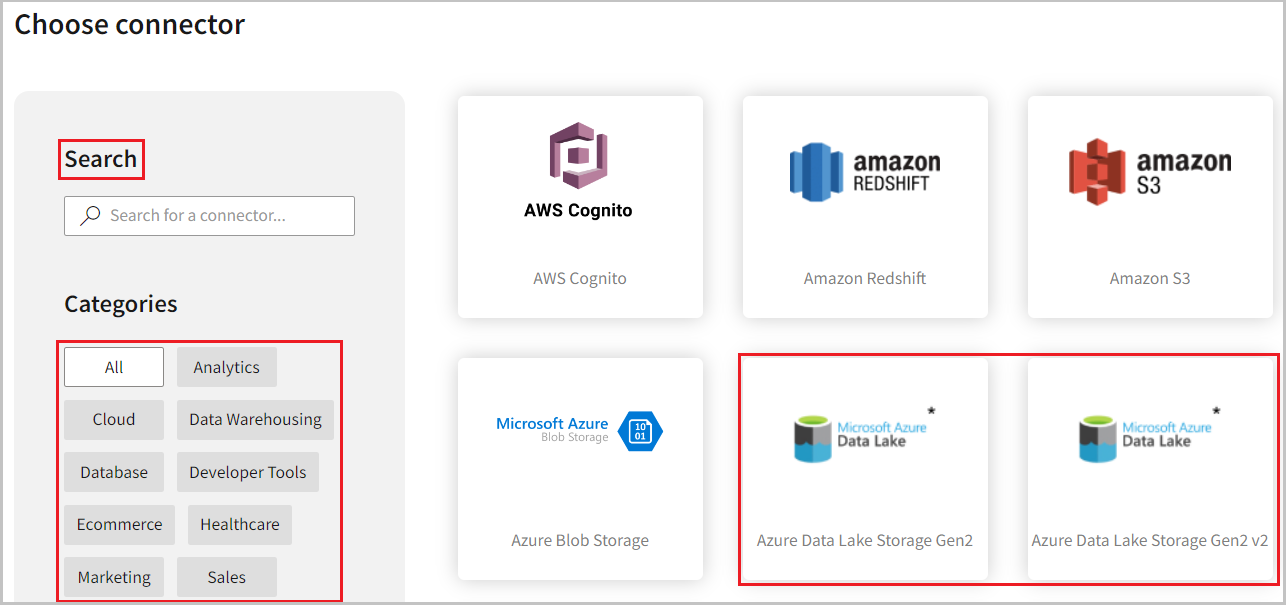
- Azure Data Lake Storage Gen2: Use this to import each CSV file as an entity.
- Azure Data Lake Storage Gen2 v2: Use this to import multiple CSV files in a folder as a single entity.
To choose Azure Data Lake Storage Gen2 connector
- In the Choose connector page, select Azure Data Lake Storage Gen2 connector.
You can use the Search feature to find the connector. Also, the Azure Data Lake Storage Gen2 connector is available under both Analytics and Cloud categories.
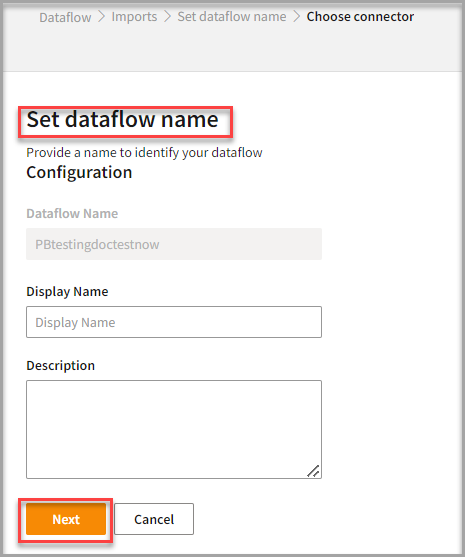
- Type a Display Name for your dataflow in the text area.
- Type a Description for your dataflow in the text area.
- Click Next.
The Configuration page appears.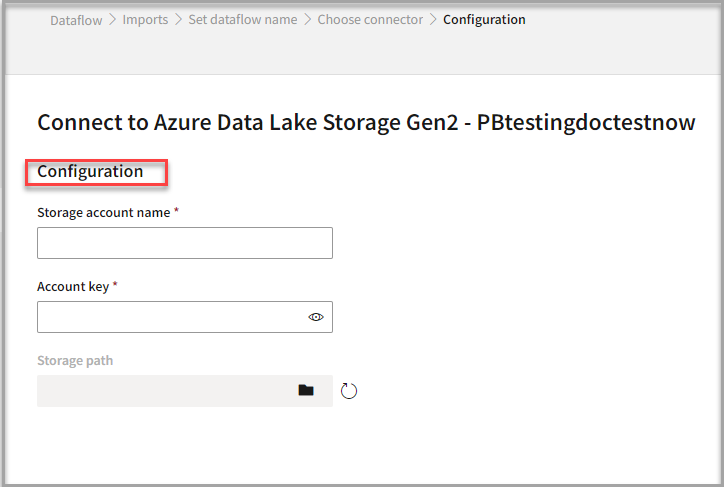 Follow the below steps to configure the connection to Azure Data Lake Storage Gen2:
- Type the Storage account name in the text area.
- Type the Account key in the text area.
- Click the Folder icon in the Storage path text area.
Once you select your Storage path, the Table Details columns appear.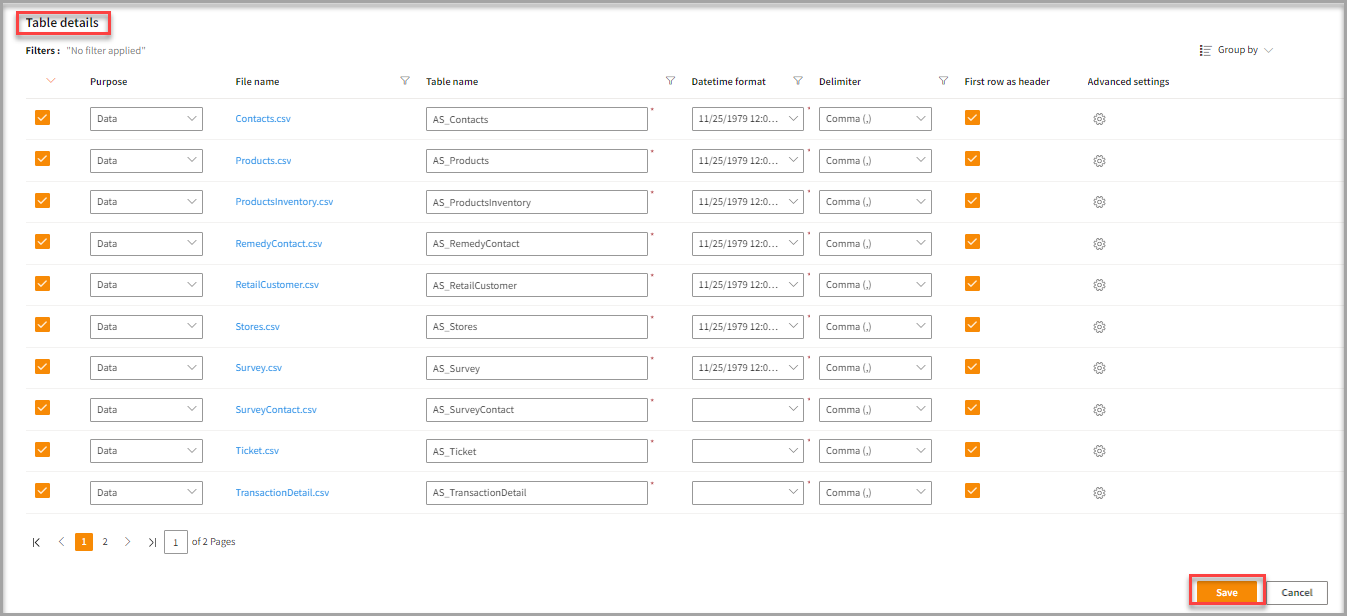
Upon selecting Azure Data Lake Storage Gen2 v2, Table Details appear as per the image below.

- Enter the Table Details to process the data.
| Item | Description |
|---|
| Purpose | Option to assign a purpose (Data or Metadata) for each table. |
| Data | Loads customer data. |
| Metadata | Loads Metadata. |
| File Name | Displays the name of the file that you imported. |
| Folder Name | Displays the name of the folder that are present in the selected folder. (Applicable only for Azure Data Lake Storage Gen2 v2) |
| Table Name | Displays the imported table name. |
| Datetime format | Displays a number of Datetime Formats and Skypoint AI is set to automatically detect them. |
| Delimiter | Displays available separators for the variables in the imported data. |
| First Row as Header | Check the box for the system to automatically collect the data according to the Header Contents. |
| Advanced Settings | Select the options to fine tune the Import process with minute details. |
- If necessary, apply the Advance settings to modify the default settings.
The Advanced settings pop-up appears.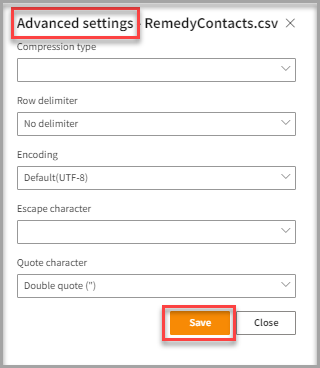
Advanced settings allow you to modify the default settings. It gives more flexibility to apply advanced use cases. However, the default settings are adequate to perform the task.
| If you want to | Then |
|---|
| Modify data types such as fixed or variable data types. | Select from the Compression type. It allows you to reduce the size of data by removing the number of bits. |
| Change the delimiter | Click Row delimiter. By default, a column delimiter is selected, and each row is separated with a comma. |
| Change information or instruction | Choose from the Encoding list. By default, UTF-8 encoding is selected. |
| Modify the escape character such as backslash (\) or slash (/) | Select from the Escape character. |
| Apply different quote characters such as Single quote (’) or Double quote (”). | Select from the Quote character. |
- Click Save.
Run, edit, and delete the imported data
Once you save the connector, the Azure Data Lake Storage Gen2 connector gets displayed in the list of tables created in the Dataflow page.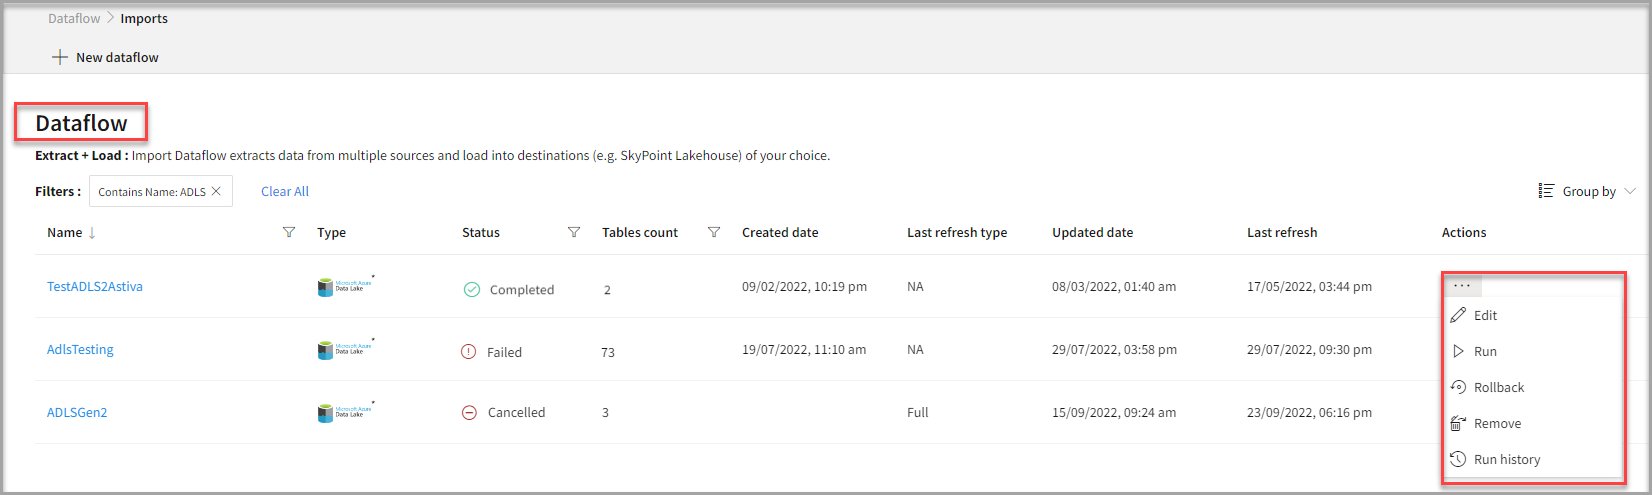
| Item | Description |
|---|
| Name | Displays the name of the imported Dataflow. |
| Type | Displays connector type symbol. |
| Status | Indicates whether the data is imported successfully. |
| Tables Count | Displays the number of tables. |
| Created Date | Displays date of creation. |
| Last refresh type | Displays the refresh value. After the last data refresh, it will indicate whether the value is Full or Incremental. |
| Updated Date | Displays last modified date. |
| Last Refresh | Displays the latest refresh date, which updates each time you refresh the data. |
| Group by | Option to view the items in a specific Group (For example, name, type, status). |
- Select the horizontal ellipsis in the Actions column and do the following:
| If you want to | Then |
|---|
| Modify the Dataflow | Select Edit and modify the Dataflow. Click Save to apply your changes. |
| Execute the Dataflow | Select Run. |
| Bring the data to its previous state | Select Rollback. |
| Delete the Dataflow | Select Remove and then click the Delete button. All tables in the data source get deleted. |
| See the run history of the Dataflow | Select Run history. |