Creating a Subscription churn
Overview
You can select a Subscription churn model to identify the customers with recurring payment for products and services. This document can help to predict whether a customer is at risk of no longer using your subscription products or services.To predict with a Subscription churn
Follow the below steps to create a customer prediction using subscription churn model:- Go to Activate > Models.
- On the Models page, click the Create tab.
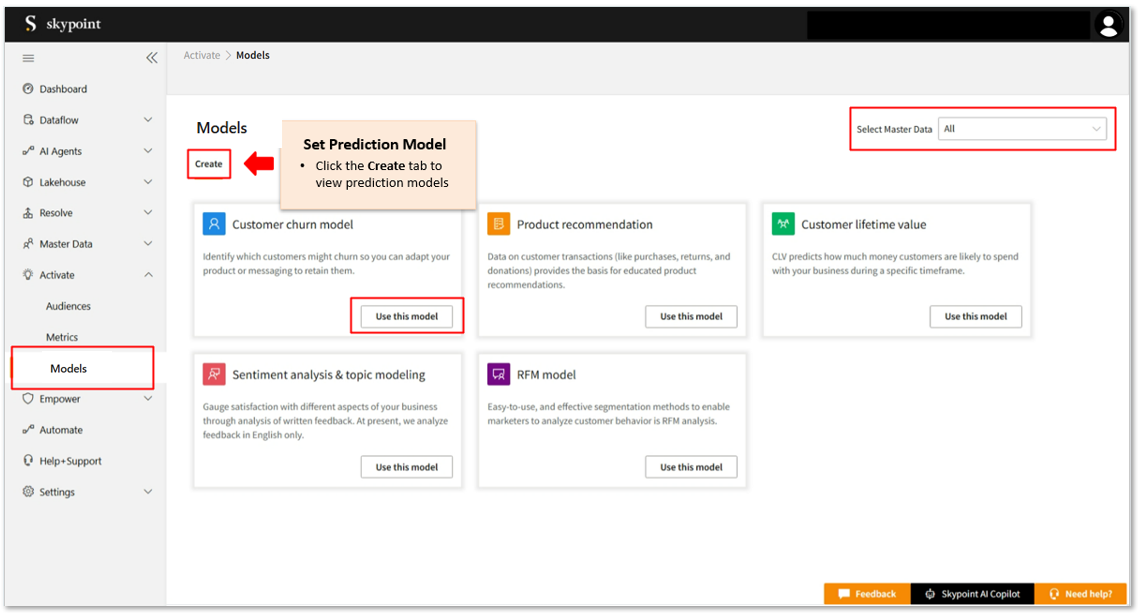
- Select Master Data from the dropdown list. When you select the master data, the system validates the selected master data type and filters the predictions based on the selection.
- In the Customer churn model, click Use this model.
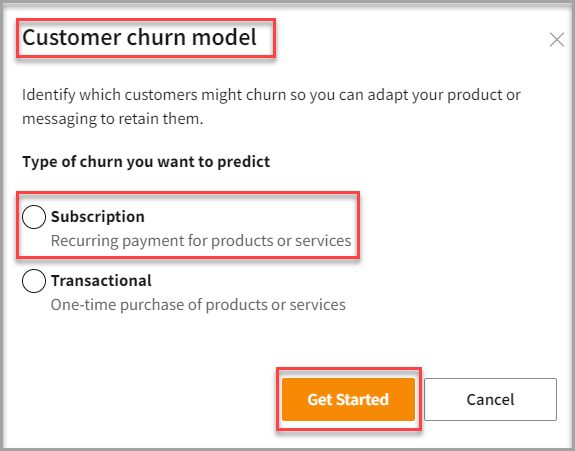
- In the Customer churn model form, select Subscription.
- Click Get Started.
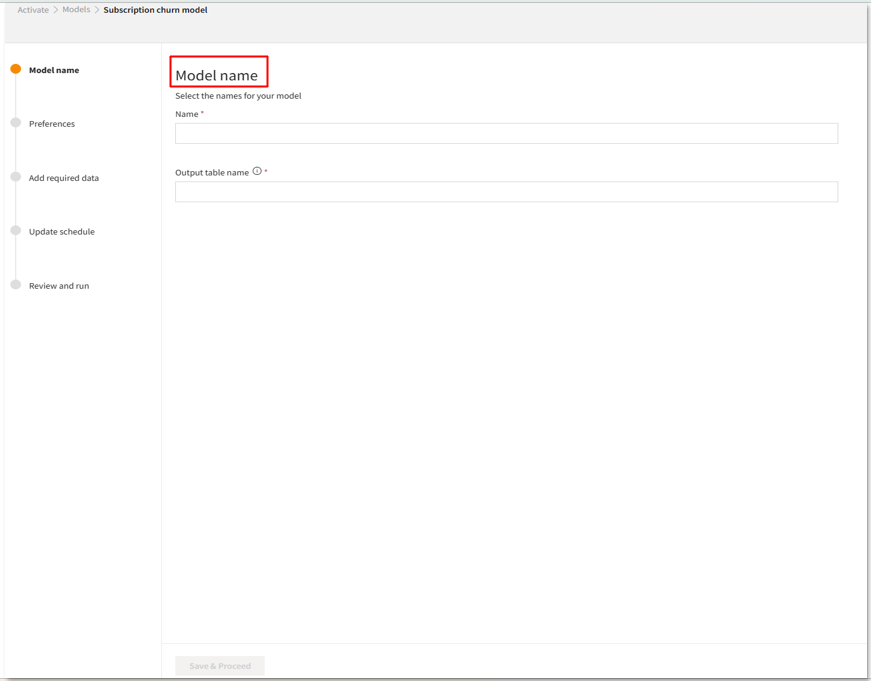
Add Model Name
- In the Subscription churn model page, type a unique name in the Name text area.
- Type a unique name in the Output table name.
- Click Save & Proceed.
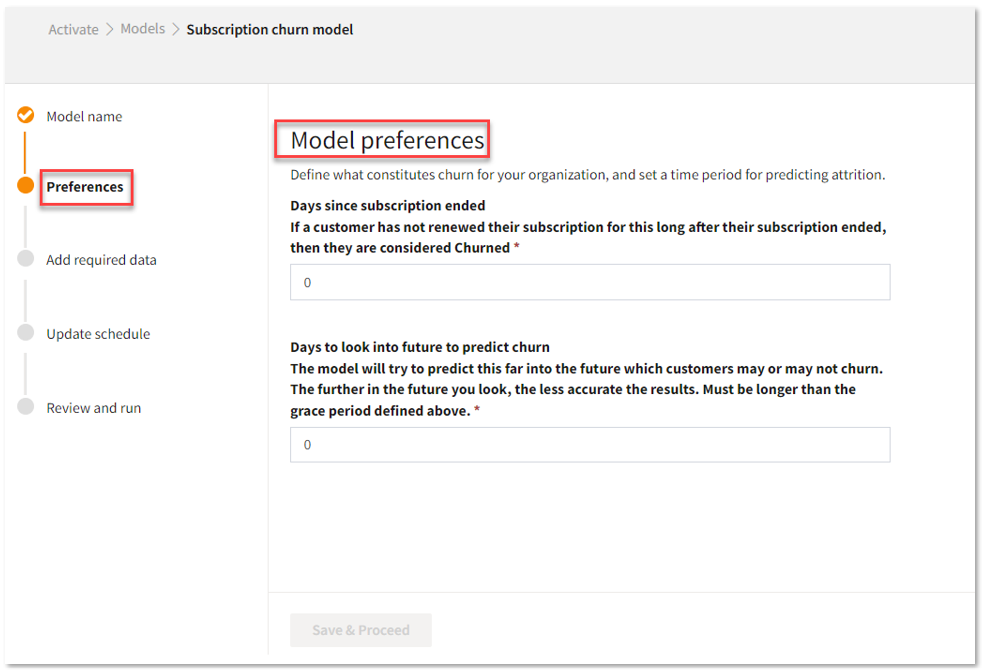
Add Model preferences
- In the Model preferences page, enter the Number of days in the Days since subscription ended text area.
- Enter the Number of days in the Days to look into future to predict churn text area.
- Click Save & Proceed.
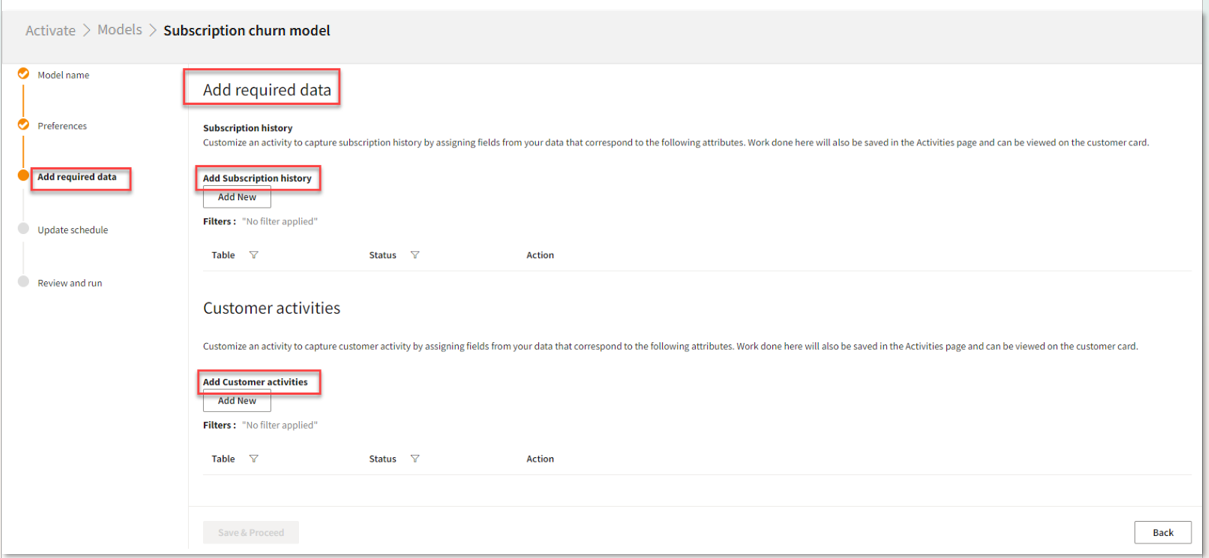
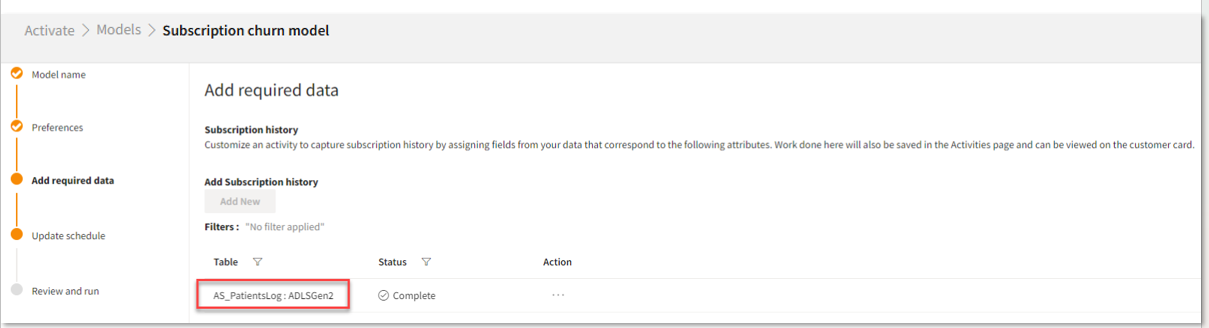
- In the Add Subscription history, click Add New.
Add Subscription history
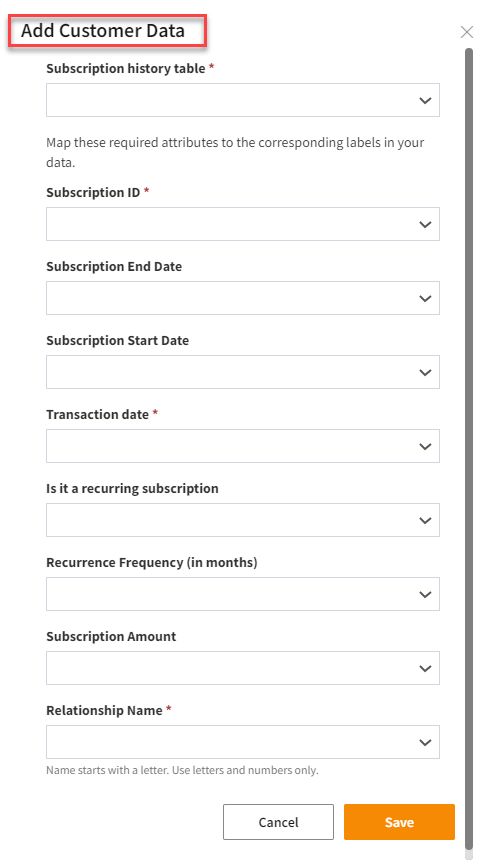
Follow the below steps to fill the Add Customer Data form for adding Subscription history:- Select a Subscription history table from the drop-down list.
- Select the Subscription ID you want to map from the drop-down list.
- Select the Subscription End Date you want to map from the drop-down list.
- Select the Subscription Start Date you want to map from the drop-down list.
- Select the Transaction Date you want to map from the drop-down list.
- Select the Recurring subscription information from the drop-down list.
- In case, it is a recurring subscription, select the Recurrence Frequency from the drop-down list.
- Select the Subscription Amount from the drop-down list.
- Select the Relationship Name from the drop-down list.
- Click Save.
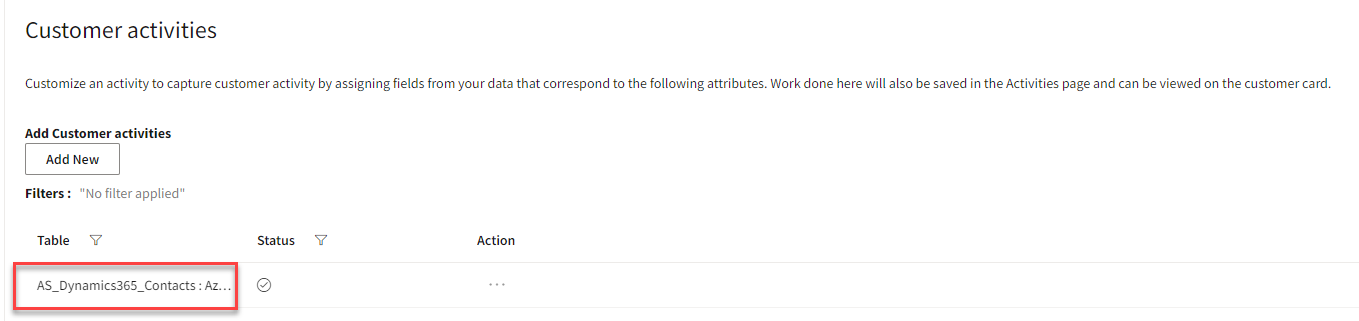
Add Customer activities
Follow the below steps to customize customer activities by assigning fields from your data:- In the Add required data page, click Add new under the Customer activities section.
- Select a Customer activity table from the drop-down list.
- Select a Primary key from the drop-down list.
- Select a Timestamp from the drop-down list.
- Select an Event from the drop-down list.
- Select Details from the drop-down list.
- In Activity type, perform one of the below actions:
| To | Do |
|---|---|
| Select an activity type from Select The Activity Type drop-down list | Click Select from existing. |
| Type a new activity type in the Activity Type text area | Click Create new. |
- Click Save.
- Click Save & Proceed.
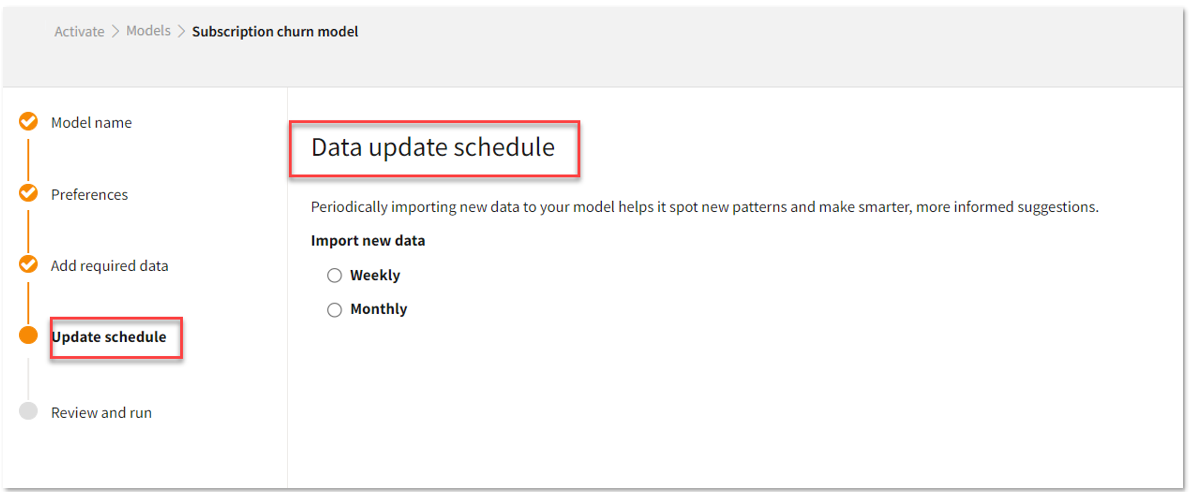
Update Schedule
Follow the below steps to update schedule to run the subscription churn model:- In the Data update schedule page, perform one of the below actions:
| To | Do |
|---|---|
| Import new data to your model on a weekly interval | Click Weekly. |
| Import new data to your model on a monthly interval | Click Monthly. |
- Click Save & Proceed.
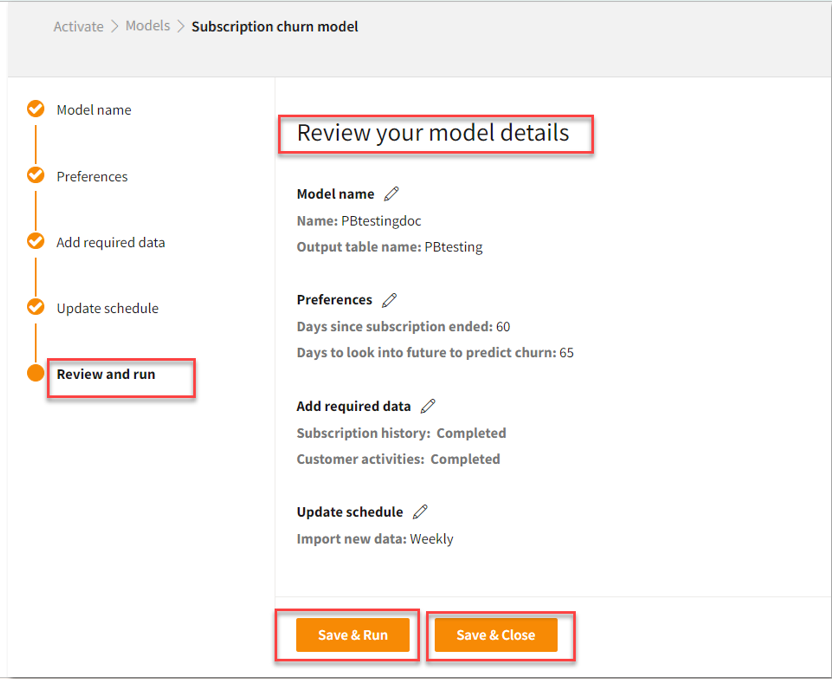
To review and run your model
Follow the below steps to save your churn model or run it:- In the Review your model details page, click the Edit icon to edit the details.
- Once you complete your review or editing, perform one of the below actions:
| To | Do |
|---|---|
| Save and run your churn model | Click Save & Run. |
| Save your churn model | Click Save & Close. |