ML (Machine Learning) Match
Overview
The purpose of the ML Match is to identify the unique profiles from the tables across data sources that have customer information. In this approach, skyStudio’s Identity resolution algorithms match the tables based on data completeness and the confidence threshold set.
skyStudio MDM uses sophisticated machine learning techniques to enable intelligent matching of data between and across applications.
Match tables using the ML Match
- Go to Resolve > Unify.
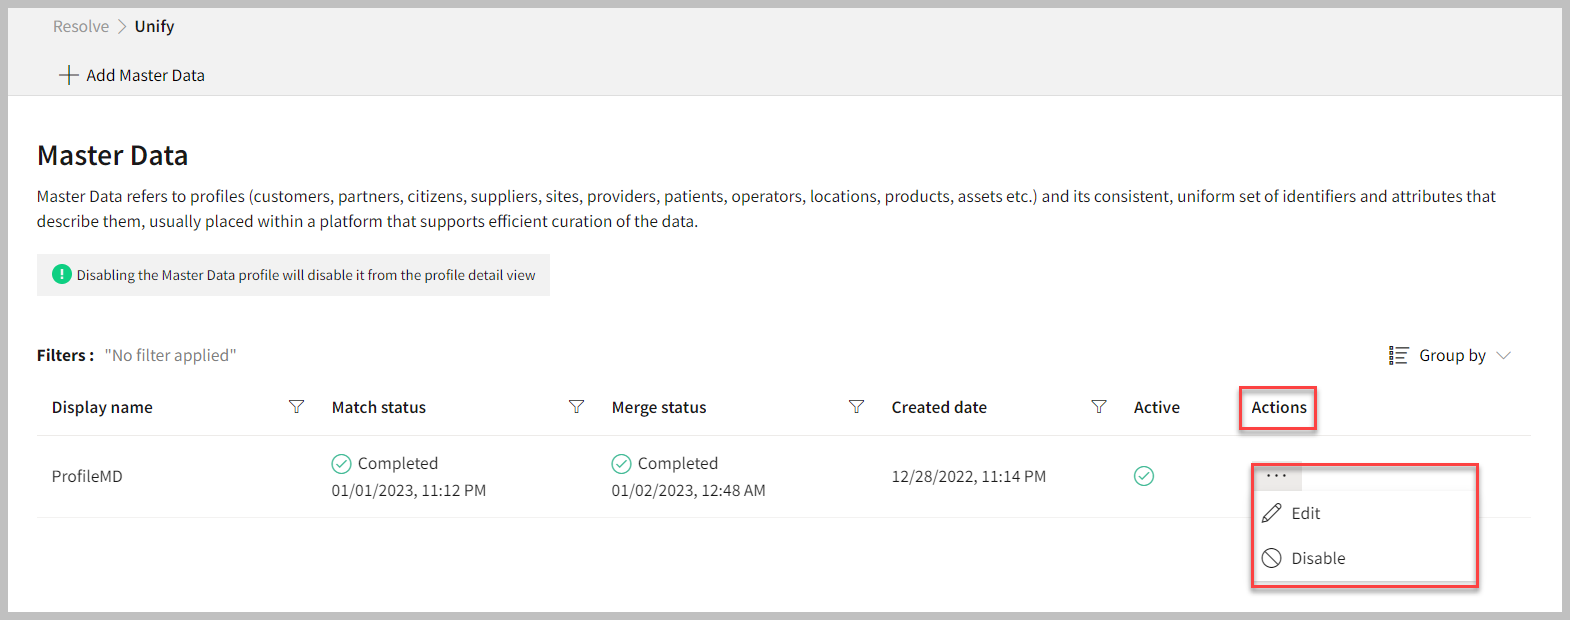
- Click the horizontal ellipsis under the Actions column.
- Select Edit.
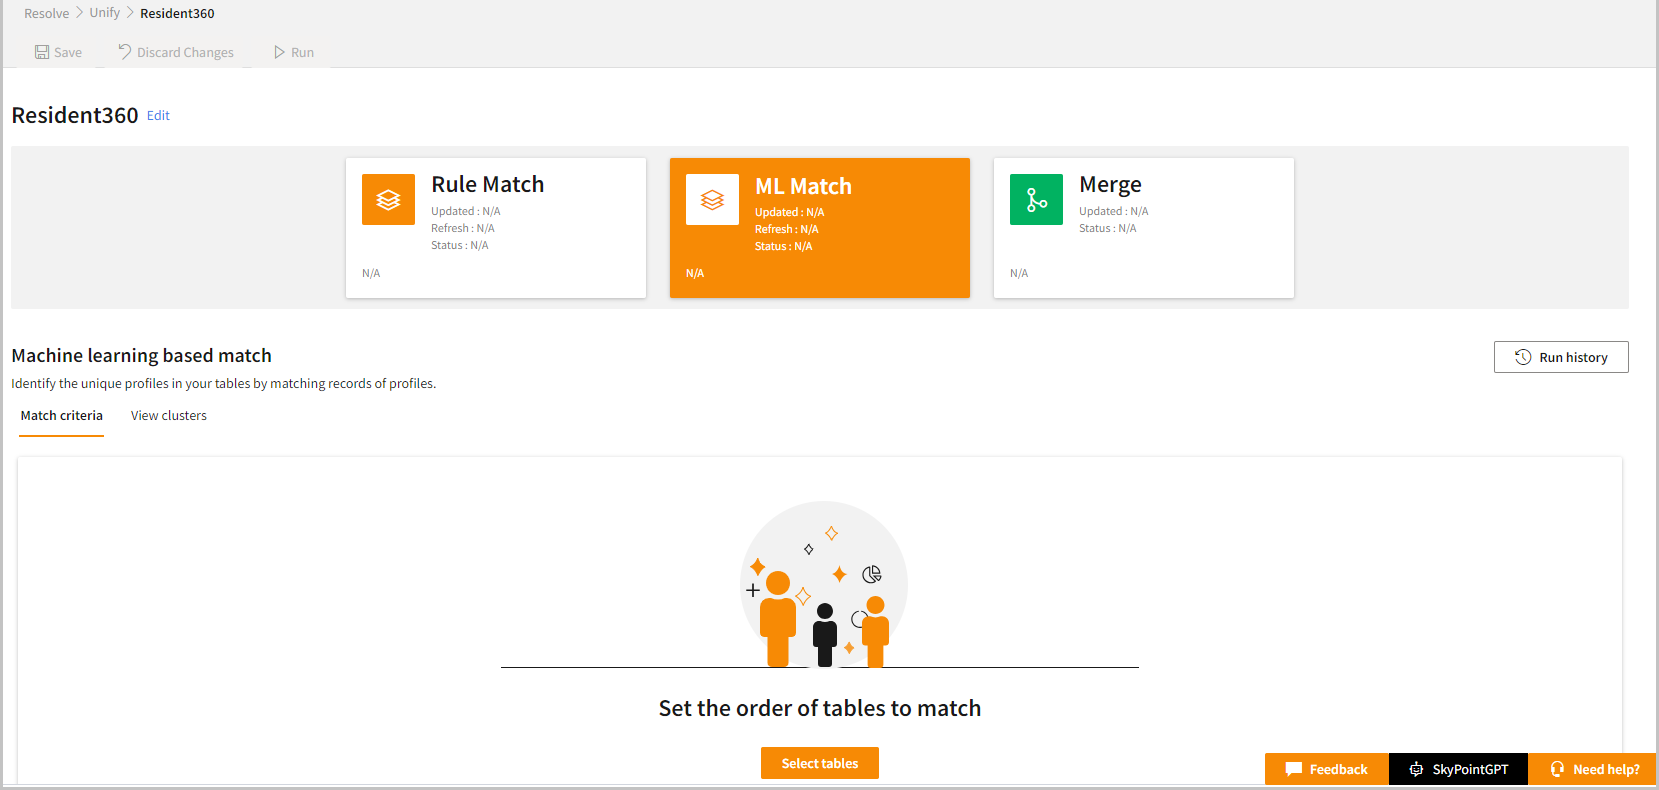
- Click ML Match.
The ML Match page appears.
Set order of tables
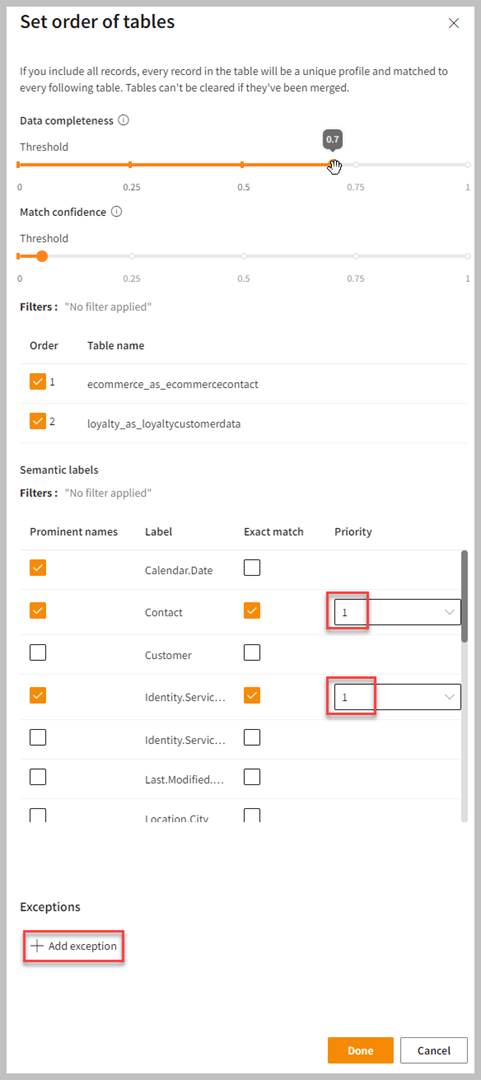
- Click Edit to select relevant tables and attributes.
The ML match order indicates the sequence in which the system matches the records. If you remove a table after running the ML match, then deselected table will be removed, and all related criteria will also get deleted. However, you need to rerun the ML match after deselecting a table for the changes to get reflected.
| Item | Description |
|---|
| Data completeness | Refers to the comprehensiveness or wholeness of the data. A higher value will ensure stringent control of data quality for tables. |
| Match confidence | Refers to the degree of certainty that a machine learning model has in its prediction. A higher value will ensure stronger matches. |
| Threshold | The threshold value ranges between 0 and 100, where 100 is an exact match. The higher the threshold value – the greater the data completeness and match confidence output. |
- Set the threshold value for Data completeness and Match confidence.
Match confidence and data completeness show exact values on hover on the slider to select the precision for confidence and data completeness. Based on your requirements, such as accuracy and coverage, you can set the threshold value that best works for you. If accuracy is more important to set the match order, then increase the threshold value. If coverage is more important, then lower the threshold value.
- Select relevant tables in the Table name column.
- Select the column names for which you want to identify unique records. If you wish, you can click on the Exact Match function to match records based on an exact match for selected columns.
- You can set the Priority of the attribute.
ML match enables you to assign equal priority to multiple attributes for exact matching, with the combination of fields used for comparison. If records do not match with the exact combination, fuzzy matching is performed using a different set of semantic labels. Customers who require a combination of specific attributes for exact matching can benefit from this feature, while also having the flexibility to consider other attributes for a fuzzy match. For example, exact match on Employee Id, group id, and fuzzy match on birthdate.
Add exceptions in the ML match
skyStudio-powered ML match allows you to exclude certain records from being matched based on specific criteria. Adding exceptions in the ML match is to handle false positives and improve the accuracy of the match results. By exempting records based on specific criteria, such as first name or product ID, you can ensure that the matching process only considers relevant information and avoids incorrect matches. This customization of the match process can improve its accuracy by excluding records that do not meet the specified criteria.
 Using the same semantic labels, you can set the criteria for the exception by comparing fields. You can add multiple exceptions, and they function as an AND clause. Exempted records will form their own separate cluster, with a unique Skypoint ID. For example:
| Skypoint Id | Group Id |
|---|
| Cluster 1 | 1 | A |
| 1 | A |
| Cluster 2 | 2 | C |
| Cluster 3 | 5 | B |
| Cluster 4 | 3 | X |
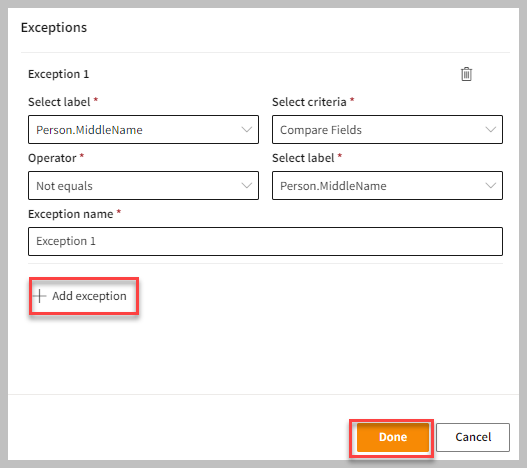
- Click Add Exception.
- From the drop-down menu, Select label attribute that you want to use as the basis for the exception rule.
- From the drop-down menu, Select criteria that you want to use for comparison. The available option is “Compare fields”.
- From the drop-down menu, select the Operator that you want to use for comparison. The available option is “Not equals”.
- Enter the Exception name for the rule that you are creating. This name will be used to identify the rule in the matching table.
- If you want to add multiple exception rules, click Add exception, and repeat the steps as mentioned above.
- Click Done.
- Click Save to apply your changes.
- Click Run to start the ML match process.
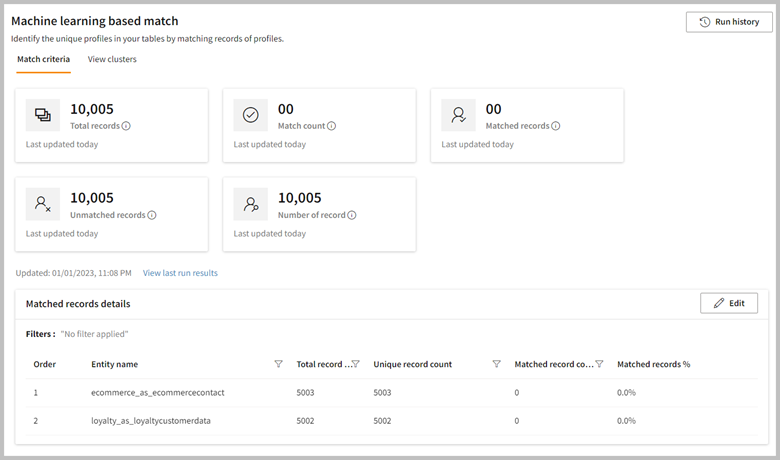
A confirmation message appears after the successful run. You can see the result on the ML match page.
- If necessary, do the following:
| To | Do |
|---|
| Discard all the changes from the last save | Click Discard Changes. |
| Cancel the run that is in progress | Click Cancel Run. |
| Add or remove the tables, semantic label criteria | Click Edit. Modify your changes and select Save. |
| See the run history of the ML match process | Click Run History. |
| See the last updated results | Click View last run results. Also, you can download the data after selecting the Download button displayed at the top right of the Last run results page. |
- To view your matched data in the cluster form, click the View clusters tab. Wait for a while to process your request. You can see the results displayed below.
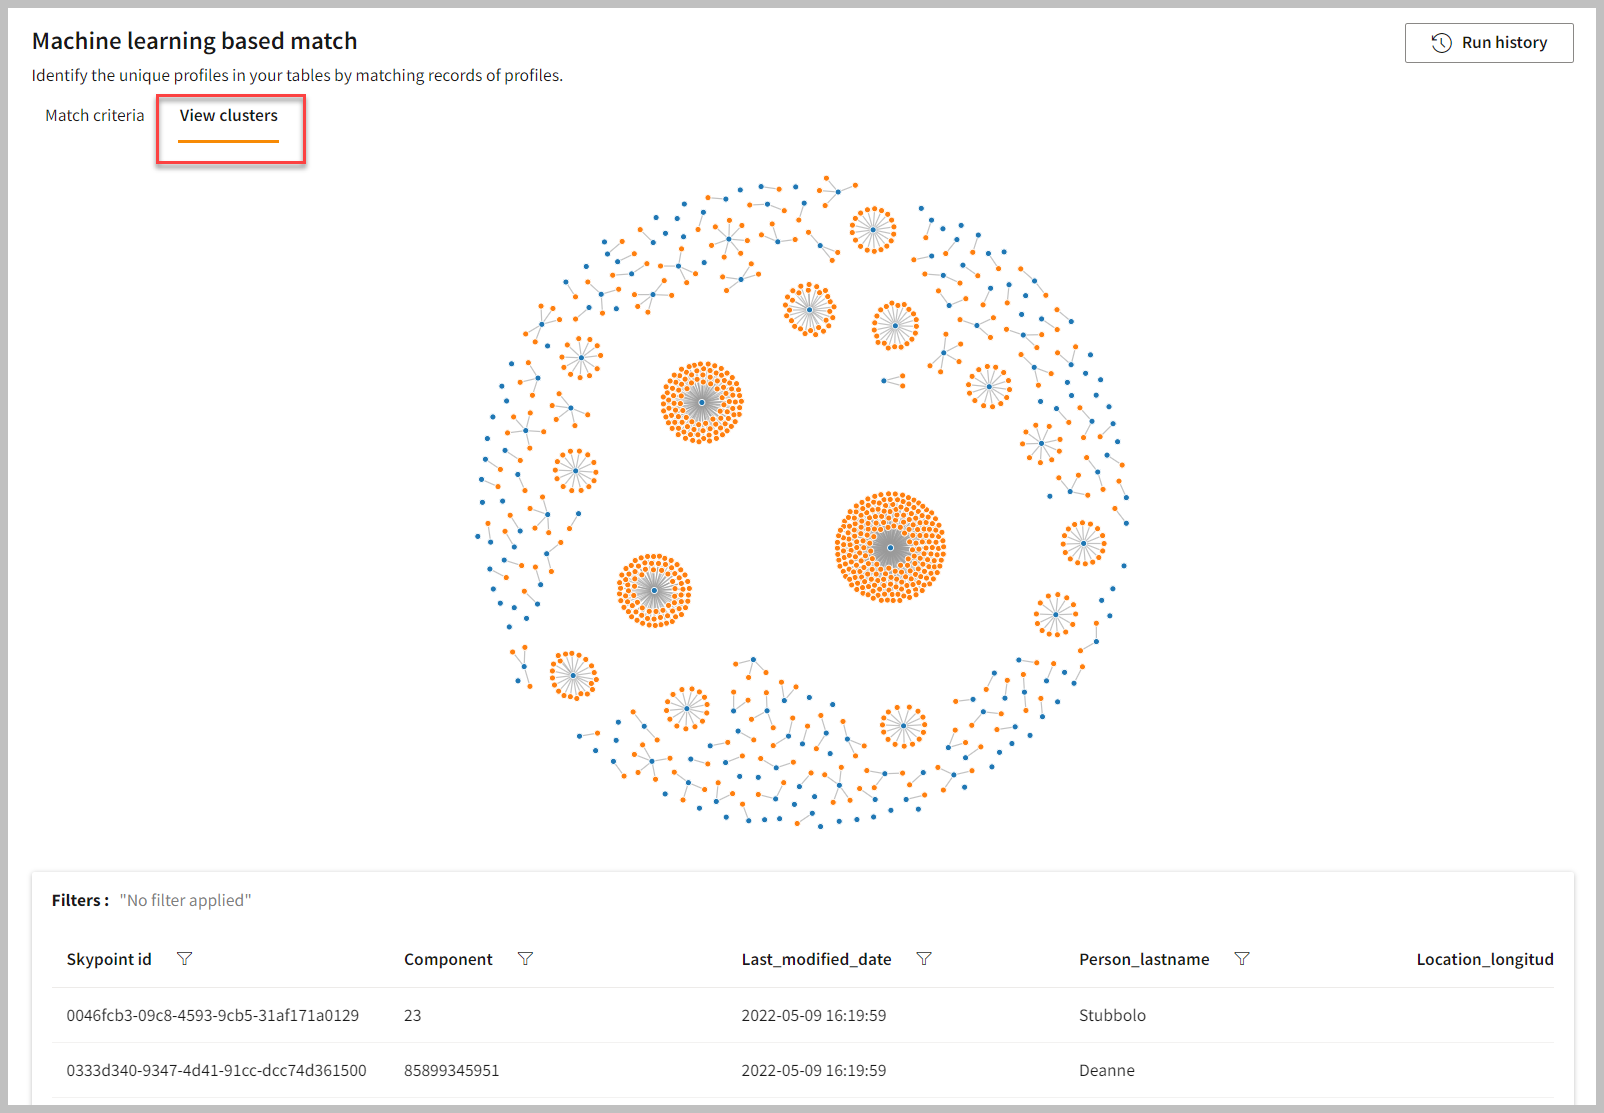 You can apply the filter to view the results either way, such as Skypoint id, phone number, last modified date, last name of the person, location, etc.
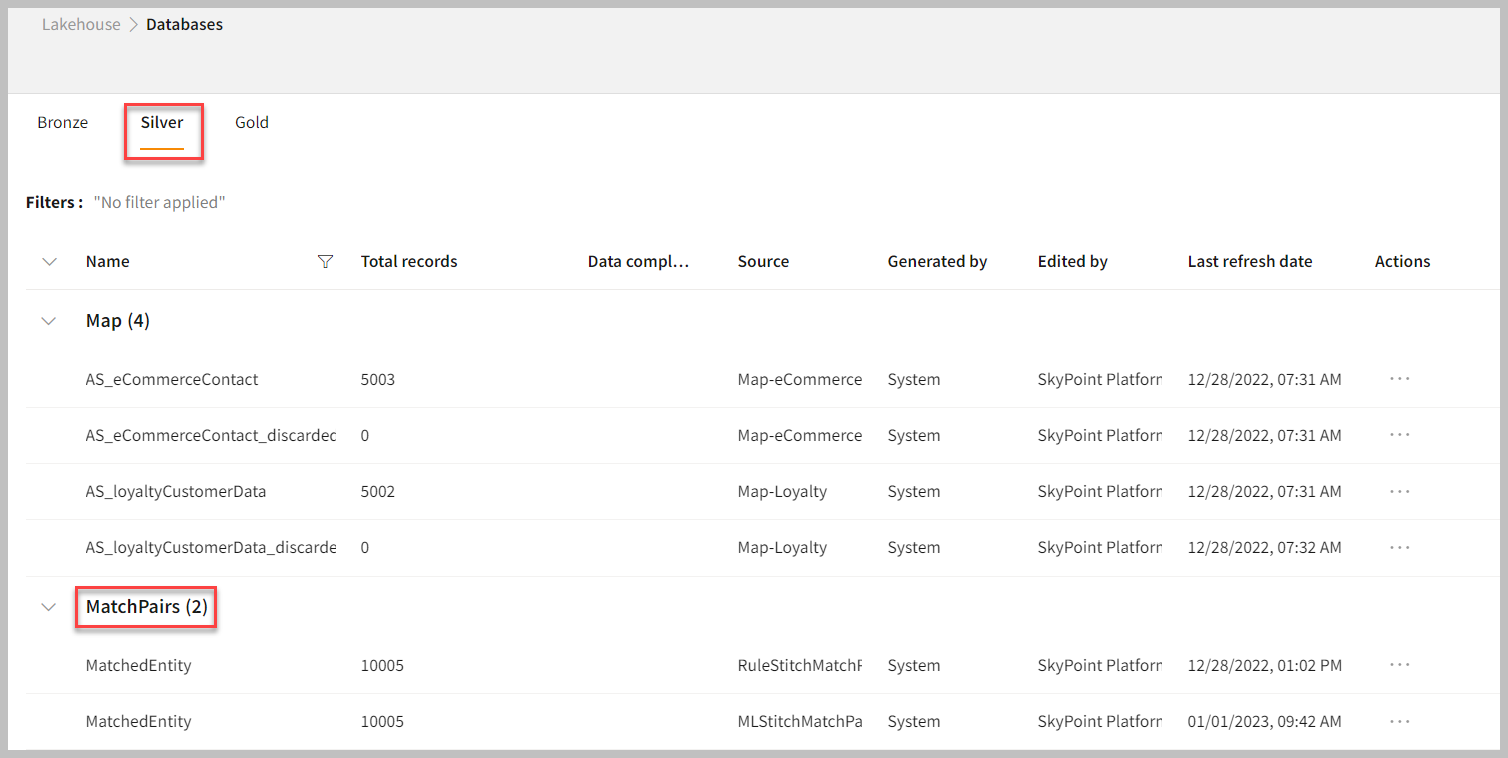
You can view the ML match tables in the Silver tab under Lakehouse > Databases.
You can apply the filter to view the results either way, such as Skypoint id, phone number, last modified date, last name of the person, location, etc.
You can view the ML match tables in the Silver tab under Lakehouse > Databases.