Creating a customer lifetime value model
Overview
You can find the total monetary worth of a customer to your business over a period of designated time with the help of Customer Lifetime Value (CLV) model. Moreover, the valuable customers can be retained by comparing CLV to marketing costs.To create CLV model
Follow the below steps to start creating a customer lifetime model:- Go to Activate > Models.
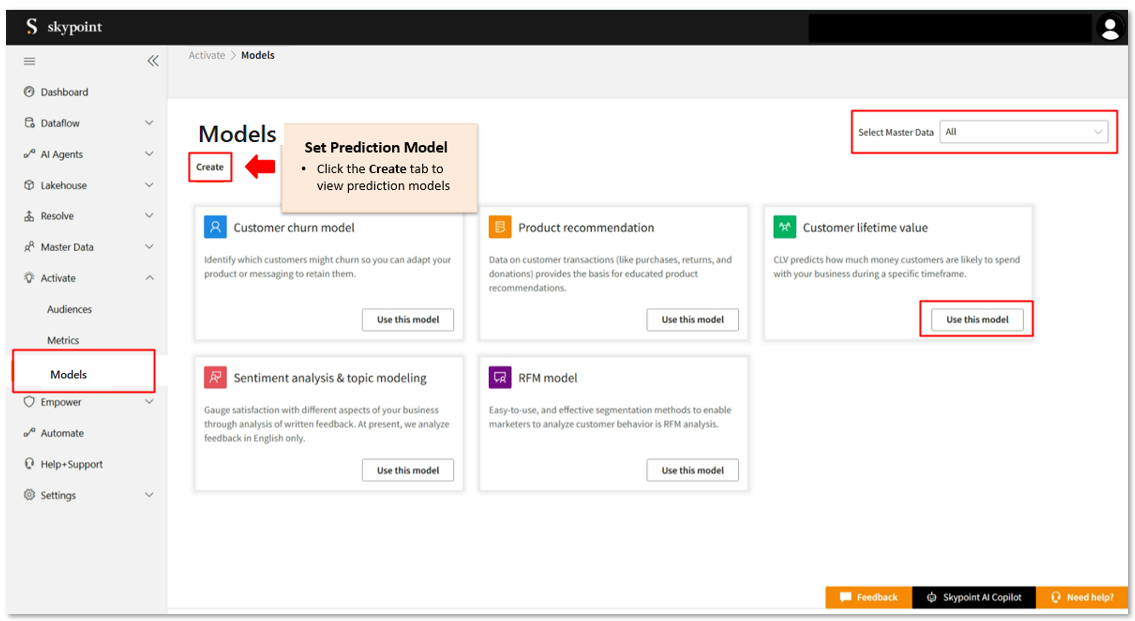
- Select Master Data from the dropdown list. When you select the master data, the system validates the selected master data type and filters the predictions based on the selection.
- Click Use this model on Customer lifetime value.
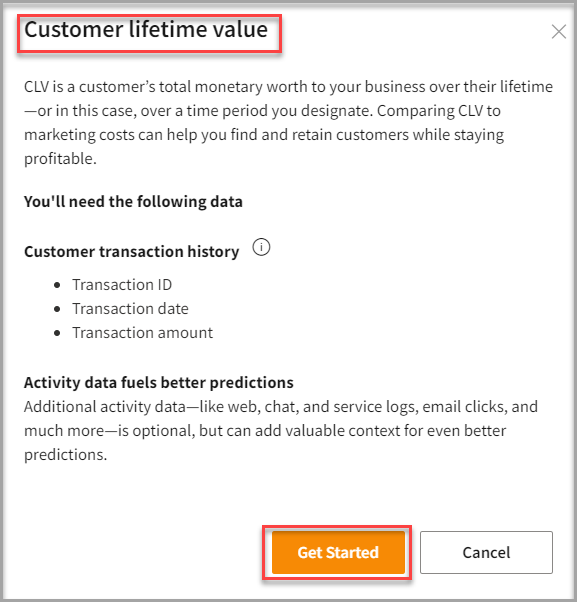
- Click Get Started.
To name your CLV model
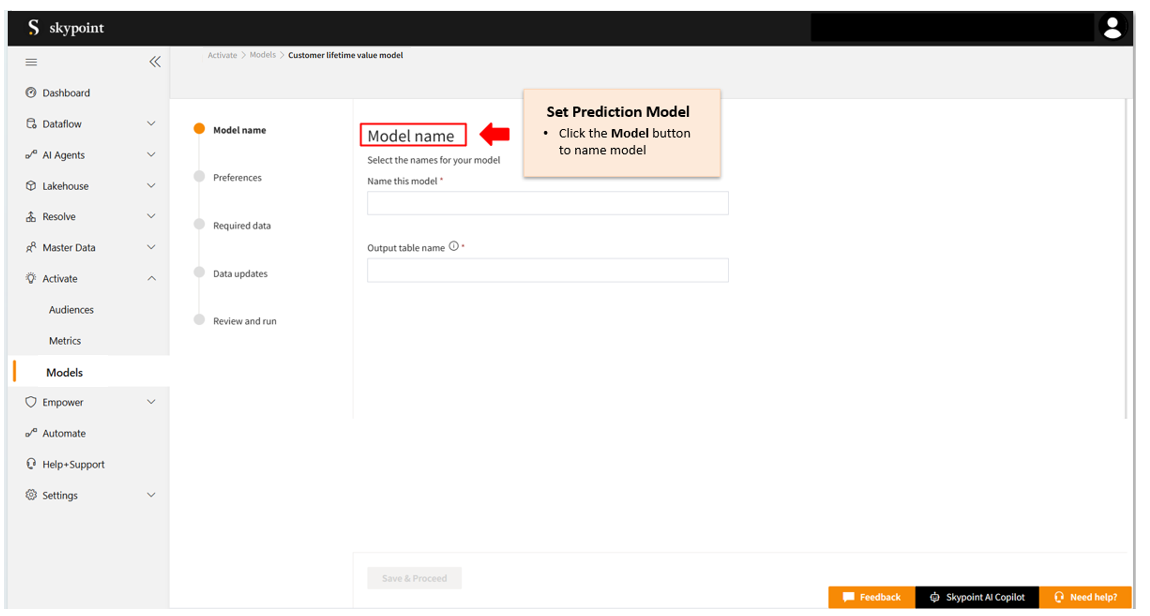
Follow the below steps to name your CLV model:- In the Model name page, type a name in the Name this model text area.
- Type a name in the Output table name text area.
- Click Save & Proceed.
To create model preferences
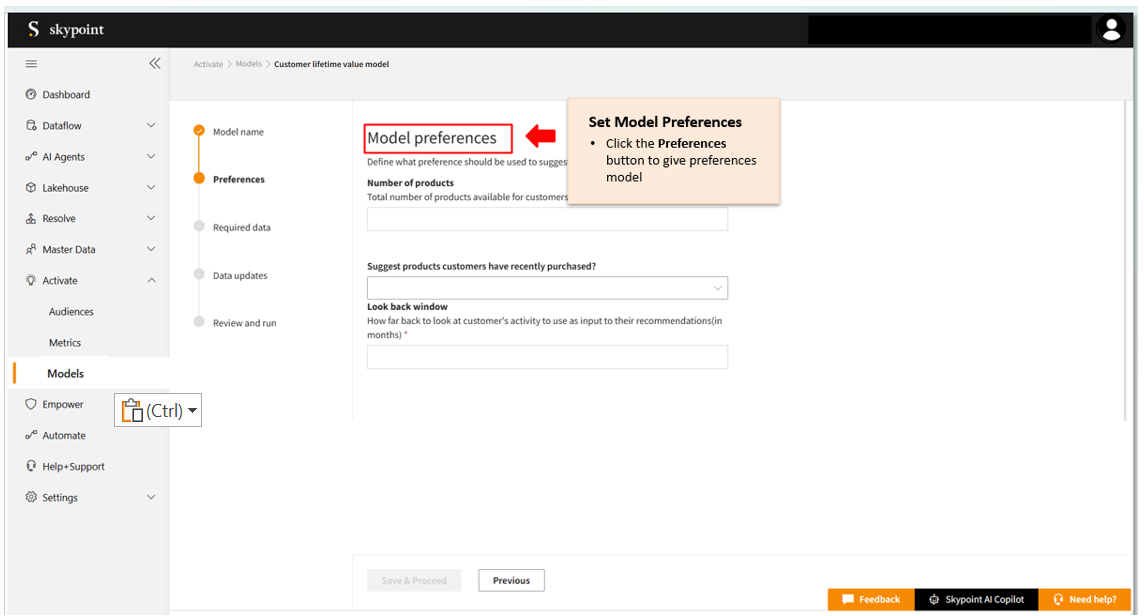
Follow the below steps to create your model preferences:- In the Model preferences page, select a value from the Predict customer value over the next drop-down list.
| To | Do |
|---|---|
| Select the time in months to predict customer value | Select Month (s). |
| Select the time in years to predict customer value | Select Year (s). |
- In the Active customers section, perform one of the following actions to check the time that a customer has spent amount of money on your products or services.
| To | Do |
|---|---|
| Let the model calculate the time span | Select Let model calculate purchase interval from drop-down list. |
| Set the time span manually | Select Set interval manually from the drop-down list. |
-
In case, you select Set interval manually from the drop-down list, perform one of the below actions:
To Do Select the time in months to predict customer value Select Month (s). Select the time in years to predict customer value Select Year (s).
- In the High-value customer section, select one of the below options to determine high-value customers:
| To | Do |
|---|---|
| Indicate the percentile of high-value customer manually | Select Percent of top active customers from the drop-down list. |
| Let the model calculate the percentile of high-value customer based on your data | Select Model calculation from the drop-down list. |
- In case, you select the Percent of top active customers from the drop-down list, enter % of active customers in the High-value customers are the top section.
- Enter a value in the Discount text area.
- Click Save & Proceed.
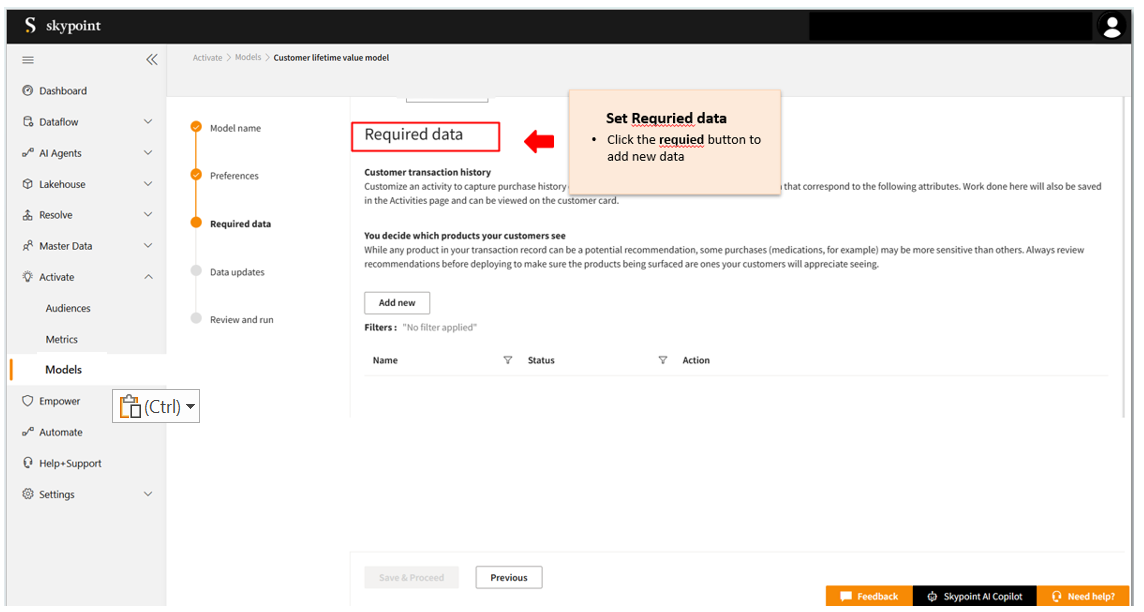
To add required data
Follow the below steps to add required data to your CLV model:- In the Required data page, click Add new.
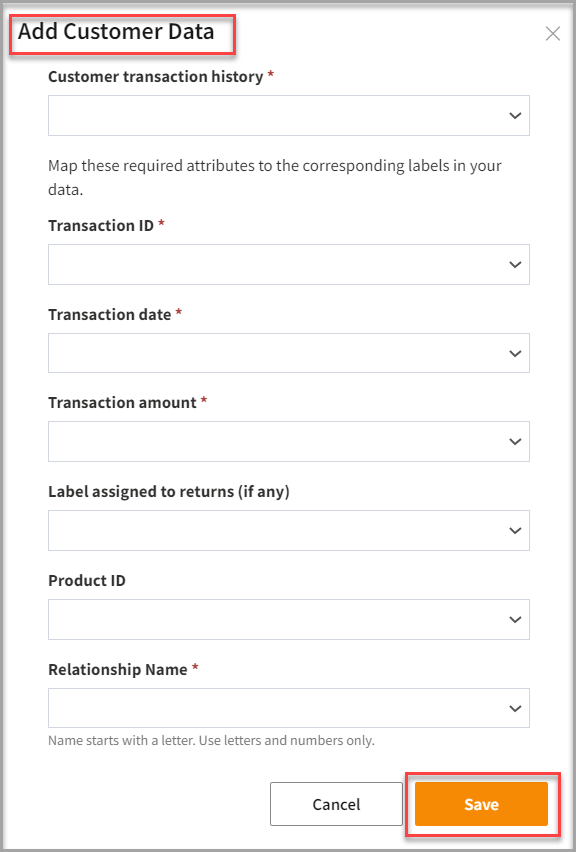
- Select Customer transaction from the drop-down list.
- Select Transaction ID from the drop-down list.
- Select Transaction date from the drop-down list.
- Select Value of transaction from the drop-down list.
- Select Label assigned to returns (if any) from the drop-down list.
- Select Product ID from the drop-down list.
- Click Save.
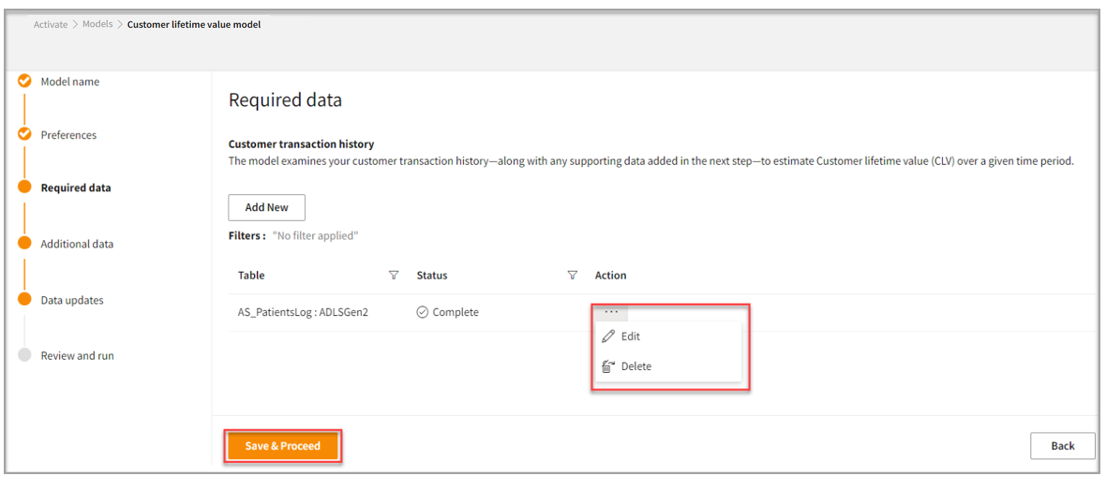
To edit the created table
In the Required data page, you can click the three horizontal ellipses under the Action column to edit the created table.- If required, you can perform one of the below actions:
| If you want to | Then |
|---|---|
| Edit the created table | Select Edit. |
| Delete the created table | Select Delete. |
- Once done, click Save & Proceed in the Required data page.
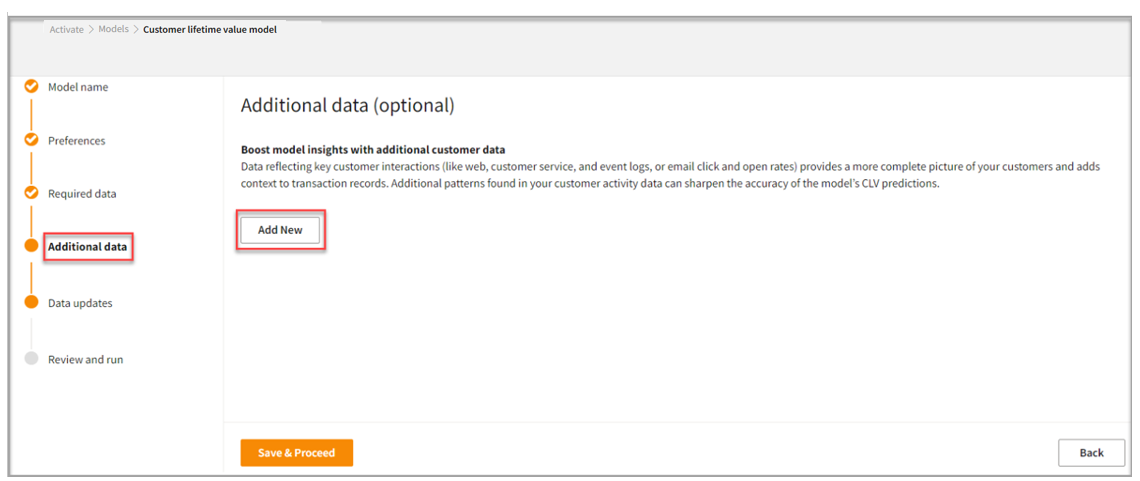
To add additional data
Follow the below steps to add additional data for the model to sharpen the accuracy of the model’s CLV prediction:- On the Additional data page, click Add New.
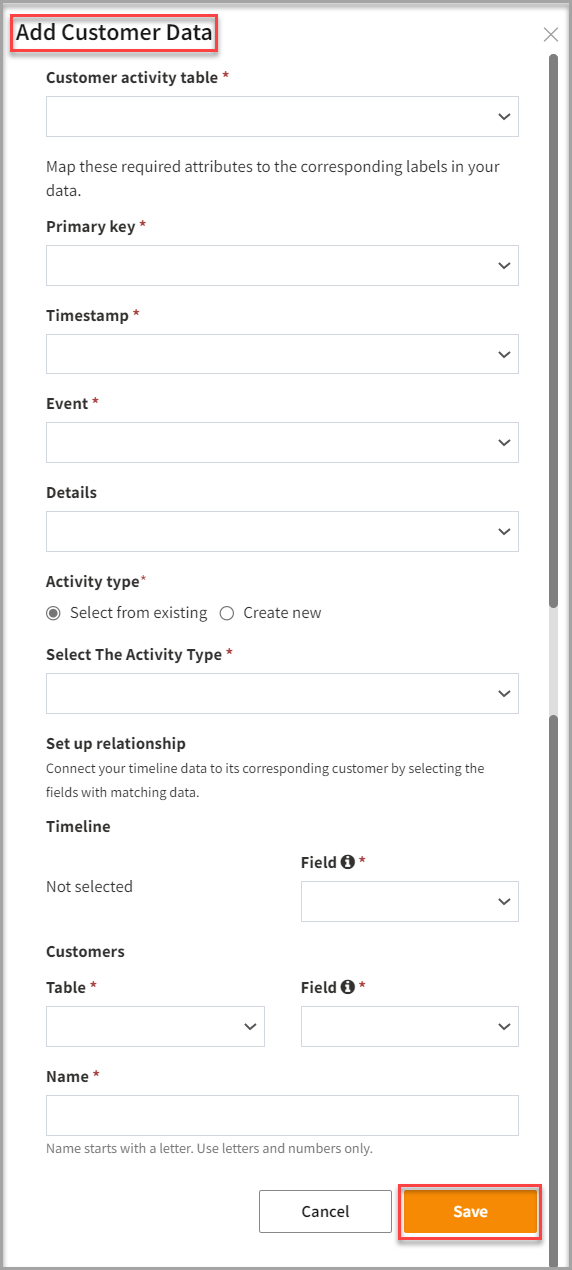
- Select a Customer activity table from the drop-down list.
- Select a Primary key from the drop-down list.
- Select a Timestamp from the drop-down list.
- Select an Event from the drop-down list.
- Select Details from the drop-down list.
- In Activity type, perform one of the below actions:
| To | Do |
|---|---|
| Select an Activity Type from the drop-down list | Click Select from existing. |
| Type a new activity type in the Activity Type text area | Click Create new. |
- Click Save.
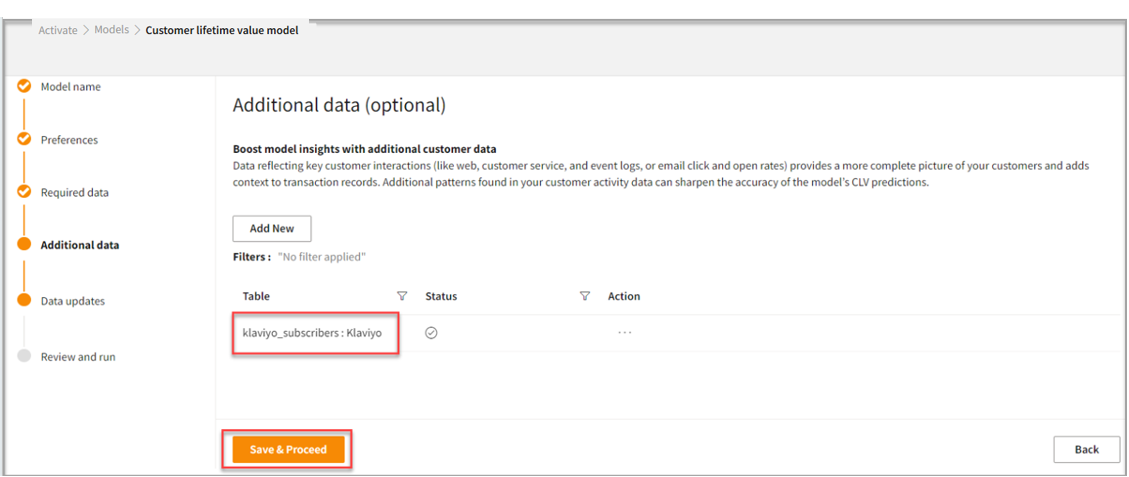
- Click Save & Proceed.
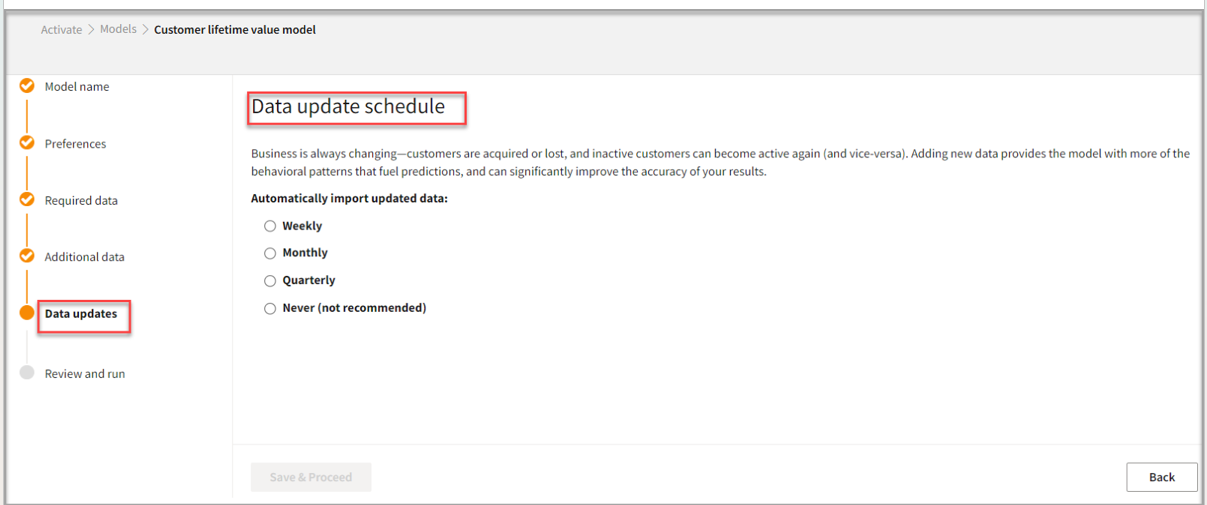
To add the Data update schedule
Follow the below steps to schedule your data update:- In the Data updates page, perform one of the following actions:
| To | Do |
|---|---|
| Import your data automatically every week | Select Weekly. |
| Import your data automatically every month | Select Monthly. |
| Import your data automatically every three months | Select Quarterly. |
| Choose not to import your data automatically | Select Never. |
- Click Save & Proceed.
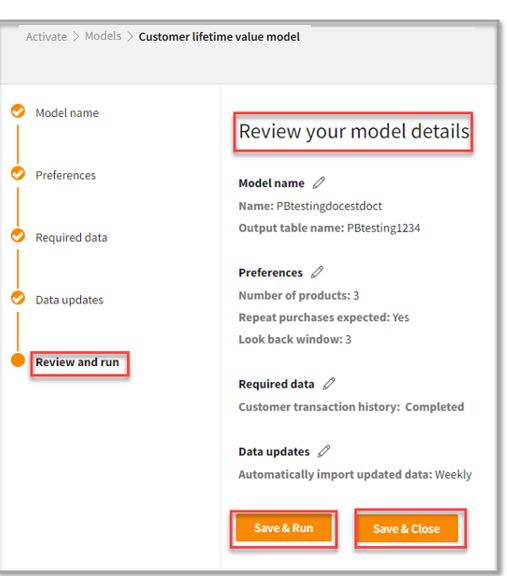
To review and run your model
Follow the below steps to save your customer lifetime value model or run it:- In the Review your model details page, click the Edit icon to edit the details.
- Once you complete your review or editing, perform one of the below actions:
| To | Do |
|---|---|
| Save and run your customer lifetime value model | Click Save & Run. |
| Save your customer lifetime value model | Click Save & Close. |
To view High or Low CLV customers
You can view your customers with high CLV on Skypoint AI. Follow the below steps to view the customers with High or Low CLV:- Go to Lakehouse > Databases.
- Click your desired CLV Database.
- Select the Data tab to view the High/Low CLV column.