Uploading Bulk Custom Models
Overview
Bulk uploading allows you to take advantage of the Machine Learning and Artificial Intelligence technologies that send data to your Azure machine learning model and brings the output. Skypoint AI creates new dimensions for understanding and segmenting your customers into high-performing audiences. Skypoint AI imports and unifies the data that you can upload for the custom integration.Prerequisites
To configure the Bulk Custom model, the following prerequisites must be met:- You must have an API of the custom object to make the bulk import request.
- Request and response body of the service should be in JSON format.
To add a Bulk Custom model
- In the left pane, go to Predict > Custom.
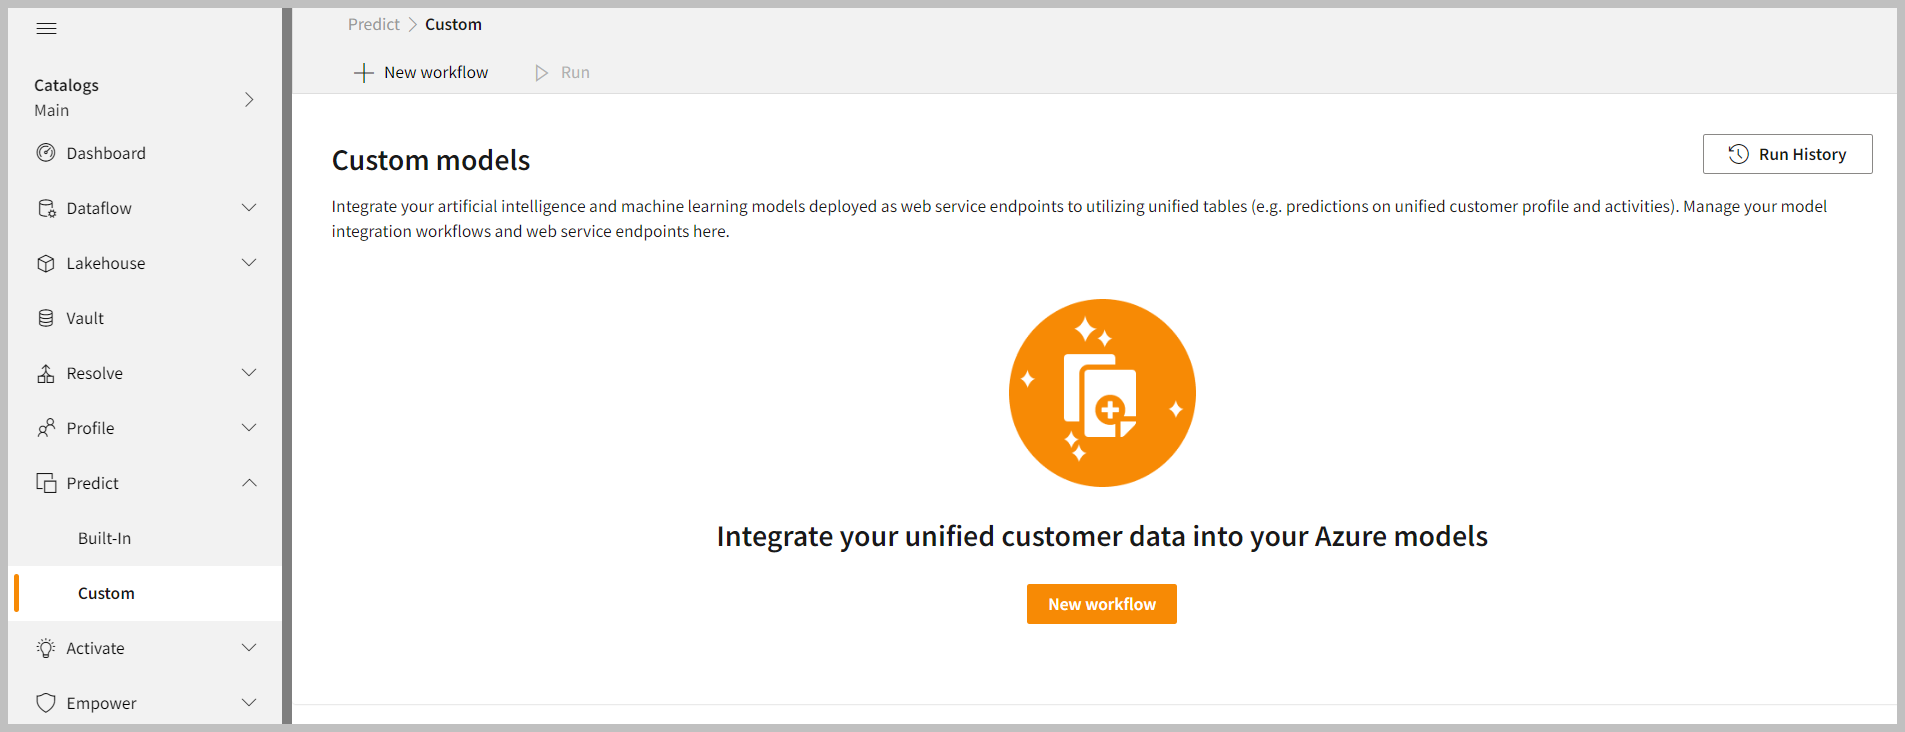
- Click New workflow.
To upload Bulk Custom models
- In the Custom models upload area, select the Bulk upload.
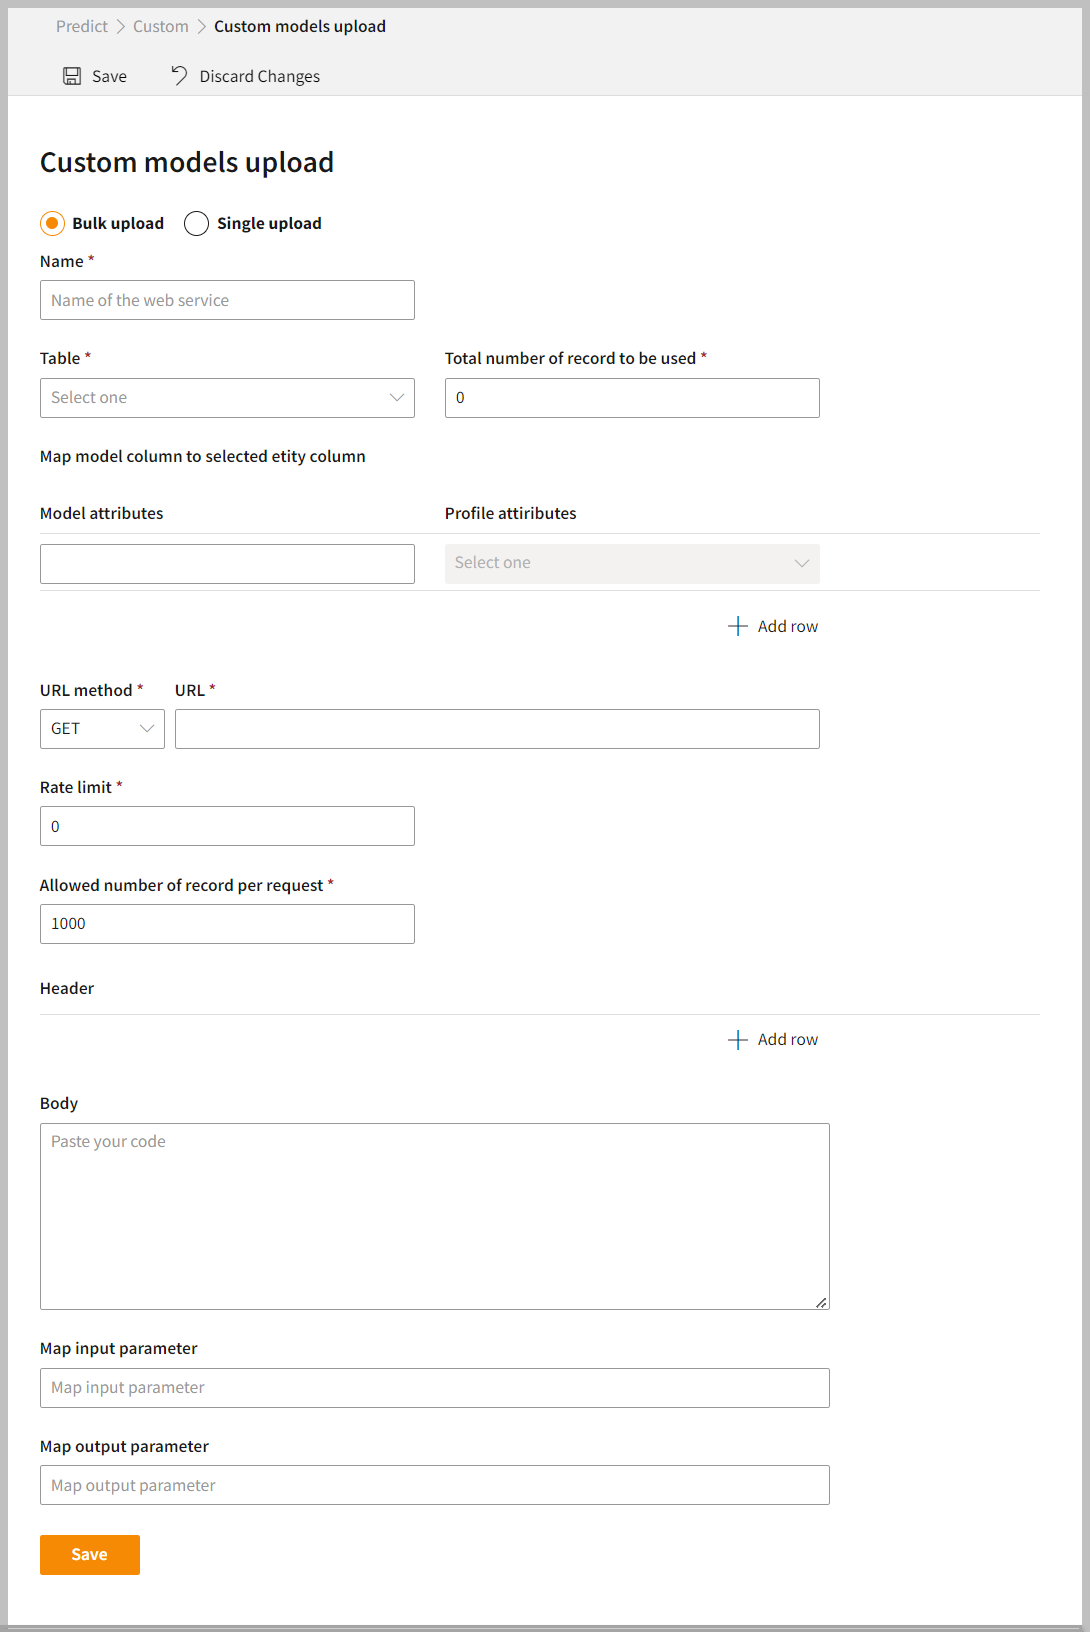
- In the Name box, enter your custom model web service.
- Select the Table from the drop-down list.
- In the Total number of record to be used box, enter the number of records to process for the table.
- Select the Profile attributes from the drop-down list.
- In the Model attributes box, enter the attributes to map the model column as per selected profile attributes.
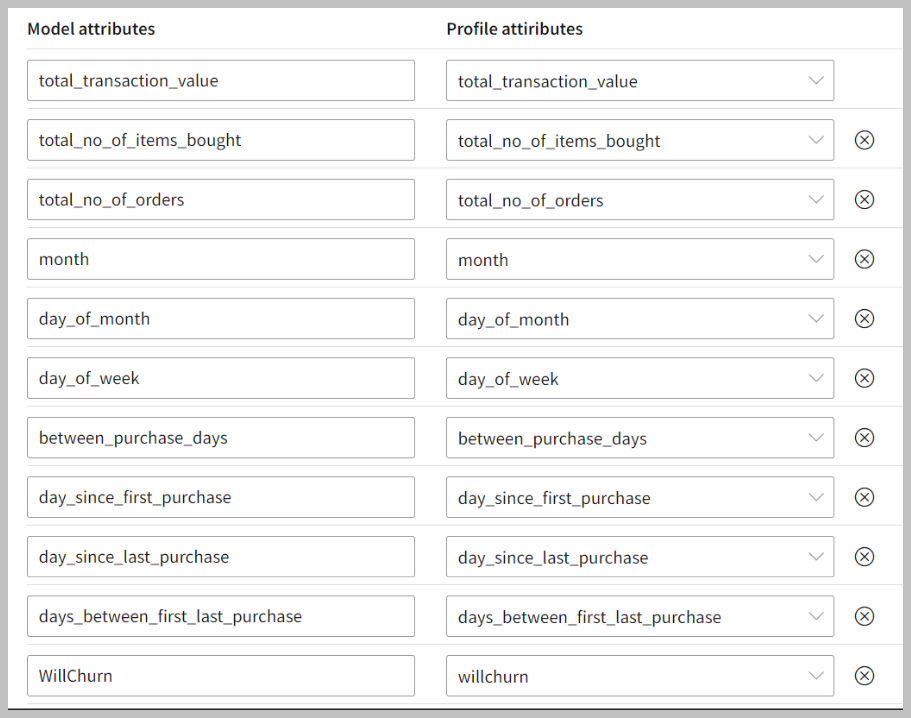
Use at least three characters to define the Model attributes. The following example shows a mapping of the Model attributes with Profile attributes.
- If you want to add Model attributes and profile attributes, click Add row.
- Enter the web address of the API name of the custom object in the URL box.
- Select the Hypertext Transfer Protocol (HTTP) method from the URL Method drop-down list.
| Item | Description |
|---|---|
| GET | Requests retrieve data from the server. |
| POST | Sends data to the server. |
| PUT | Replaces all current data of the target resource with the uploaded content. |
| DELETE | Removes the resource. |
- In the Rate Limit box, enter a rate limit of an API request per second.
- In the Allowed number of record per request box, enter the number of record.
The rate limit of an API works as a gatekeeper that processes the amount of incoming or outgoing data per second. This is the number of parallel requests created on an API. The rate limit ensures that the user does not exceed the maximum rate limit. For example, if an API processes 1000 records per second with a rate limit of 5, then this API can process 5000 requests per second. If request exceeds the rate limit, it generates an error message.
- Click Add Row to enter API address in Header.
- Enter JSON code in the Body area to pass the data.
- Enter Map Input Parameter.
- Enter Map Output Parameter.
- Click Save to apply your changes.
This is just a sample request of the client’s API. With this request, the object is one of the properties which is supposed to contain data for the Client’s custom model. When you run the custom model, we will append the data from the Skypoint AI data store in form of an array to this property and send it over to the configured custom model API. Here, the input parameter is input.data.
Item | Description |
|---|---|
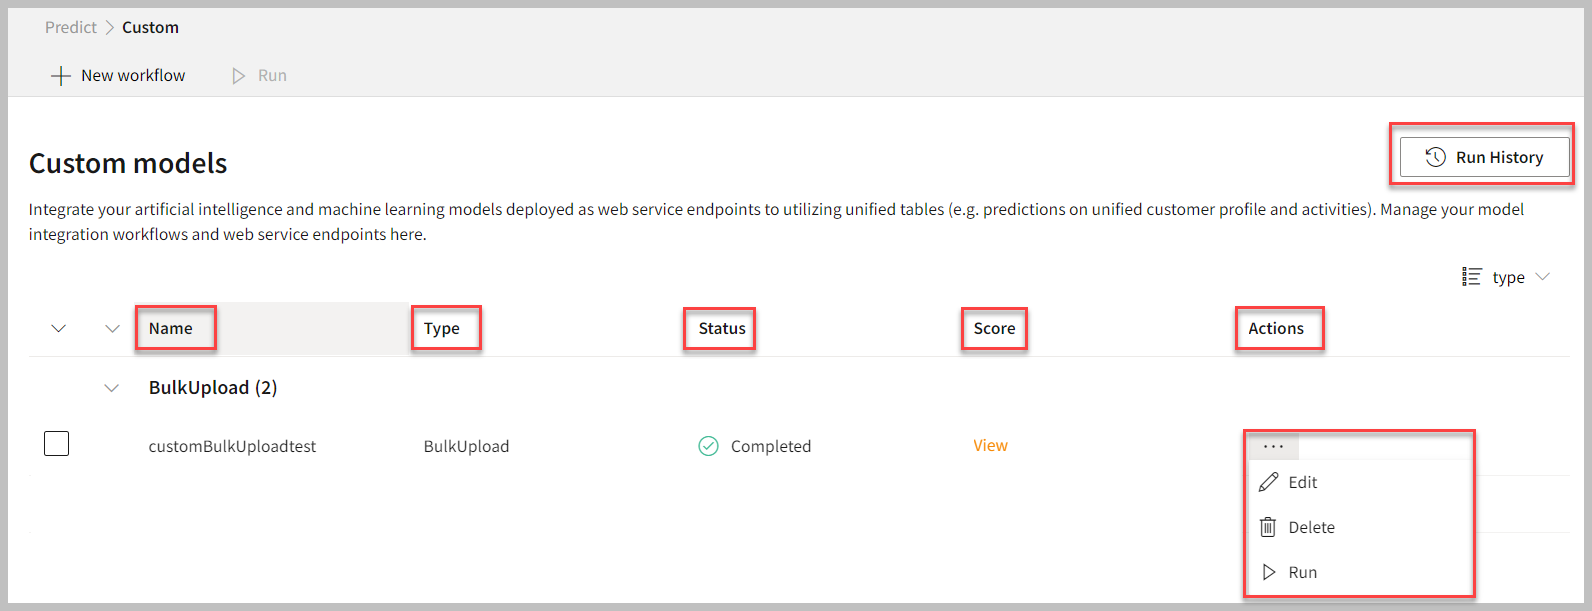
| Name | Name of the custom model. |
| Type | Type of the custom model such as Single Upload or Bulk Upload. |
| Status | The status of the run command on the custom model. |
| Score | Indicates the score of the custom model. Click View to see attributes and data in the Database section. |
| Actions | Option to perform activities such as Edit, Delete, and Run. |
| Group by | View the items in a specific Group (For example, Name, Type, status, and score). |
| Run History | See the run history of the custom models. |
To Run, Edit, and Delete the workflow
Follow the below step to perform actions for the custom models:- On the Custom models page, select the horizontal ellipsis in the Actions column and do the following:
| If you want to | Then |
|---|---|
| Edit a workflow for previously created custom model | Select Edit and modify the custom models. Click Save to apply your changes. |
| Remove a workflow | Select Delete and click Yes to remove the custom model. |
| Execute the custom model | Select Run. |